Many model railroaders would benefit from using smartphones as Throttles, but most are not computer experts, and may be intimidated by the setup required. To lower this bar, I've preconfigured everything needed to get started, and provide the software free of charge.
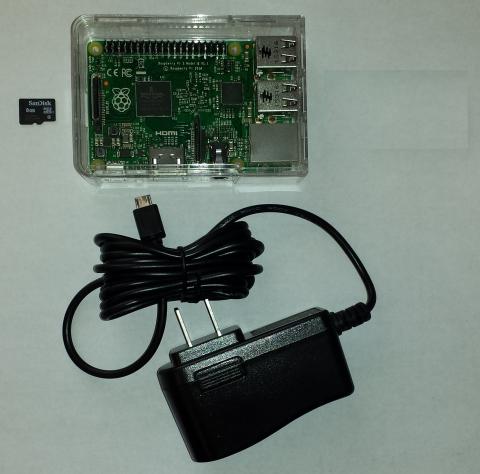
First, start with the tiny RaspberryPi computer ($45). Download my free, preconfigured image to your computer and write it to a microSD card (using Etcher1.8.x Rufus). Connect your supported DCC hardware, then simply turn on main power, and the RPi will start up and load JMRI, scanning for your layout hardware connection. It will also start up a dedicated wireless network on the RPi. Within 30 seconds, you can connect your phone(s) or pad(s)to the RPi's WiFi and start running trains! The RPi needs no screen, keyboard or mouse, so it can stay nicely out of the way under the layout, or in your electronics box [photo].
Below are the details of how to get your own JMRI RaspberryPi access point for EngineDriver, WiThrottle, and WiThrottleServer-compatible devices.
Contact me [here] if you have any questions, or to let me know how the image works for you.
Hardware
| Item | Purchase |
| RaspberryPi 4 Model B 2Gb (models 3 and 5 also work) | Newark |
| 5.1V 3A Power Supply | Newark |
| 16Gb MicroSD memory card (or larger) | NewEgg |
| RPi Case (**optional ) | Newark |
Software Image
I have built an image file which contains all software and config needed to autostart JMRI PanelPro on the RPi, as an access point, with WiThrottle Server, Web Server and LoconetOverTCP (or JMRI Simple) server included. Also included is remote access to the RPi via ssh (command line) and to the RPi "desktop" via VNCServer (at port ::5900). The image features:
- AutoIdentify of attached hardware (Locobuffer-USB, LocoBuffer-NG, PR3, SPROG, LENZ USB, NCE Serial, NCE USB (Note 1), DCC-EX, EasyDCC Serial, MERG USB, MRC Prodigy)
- Autostart of JMRI PanelPro (with WiThrottle and Web Server) to match hardware connection. (enabling DecoderPro)
- Creates its own wifi access point for device connection (disabling the Access Point to enable wifi client)
- Use Ethernet port for wired connection to existing network or to a standalone wifi access point.
- You can upload roster files and icons via the JMRI web server.
- Web server extensions for restart/shutdown of the RPi, viewing the session.log, etc.
- Access to GUI desktop via attached monitor or remotely via VNC client
- Support for defining GPIO Pins as JMRI Sensors and Turnouts
- Latest Raspbian Bookworm image
- Secure remote file access via SCP or Windows file share.
Note 1: for NCE USB autoIdentify, remove all jumpers prior to powering on.
To Use
From a Windows computer or Mac, download the latest image file: [May 18, 2026 (JMRI 5.15.7)] or an earlier file: [January 1, 2026 (JMRI 5.14)], then use Etcher1.8.x to Flash! [screenshot] the downloaded .xz file to your microSD card. (do not unzip! and do not use newer Etcher!) Then place the card in your RPi, connect and power on your DCC hardware, then power on your RPi. NOTE: always answer "No" to any "Format Drive?" or "Scan Drive?" messages.
![[screenshot]](/sites/default/files/BalenaEtcher1.8.10.png)
Running Trains
Once you've assembled the hardware and installed the image, first connect your RPi to your layout via your system's USB or serial connector, then plug in the RPi's power adapter. You should see some LEDs on the RPi begin to blink, and shortly, using your wifi-capable phone, you'll see a WiFi network named "RPi-JMRI". Select it and enter "rpI-jmri" when prompted for the key (note that 3rd character is a capital "eye"). Open EngineDriver on your phone, and you should have an available connection under Discovered Servers named "RPi-JMRI [connection name]". (Similar with WiThrottle on iPhone). Select that server, then select a loco address and run trains!
Note: If you see "No Layout Connection!" as the Discovered Server, the autoIdentify did not identify your hardware. Retry steps above (with layout hardware attached and powered up). Or access the RPi desktop and run "Disable autoIdentify", then use PanelPro to select and (if needed) modify or create the proper Config Profile.
Accessing the RPi
You can access the JMRI Web Server at http://RPi-JMRI.local:12080. It includes buttons to "Shutdown RPi" and "Restart RPi", as well as menu options to access panels, roster, tables, operations features, and view the JMRI session log.
The RPi is always at "RPi-JMRI.local" and running VncServer, so you can use TigerVNC or RealVNC client to access the desktop (use address "RPi-JMRI.local::5900"). Via the desktop, you can easily change and save settings in JMRI PanelPro.
You can also use remote access tools like Putty for command line, and WinSCP (use port 22) or Windows file sharing [screenshot] for file access, for tasks such as copying your roster and panel files over to the RPi. (user is "pi", all passwords are "rpI-jmri", 3rd char is a capital "eye"). Put these files in the /home/pi/JMRI_UserFiles folder. You can also upload your roster files using the JMRI Web Server's Roster page [screenshot].
Note: some devices and/or networks have issues resolving by name, so you can try "192.168.6.1" instead of "RPi-JMRI.local" in the commands above.
AutoIdentify
By default, this image will attempt to auto-identify your attached hardware and start JMRI with a matching profile. You can disable this feature if it fails to identify your hardware (or any other reason), by double-clicking the "Disable AutoIdentify" icon. After that, you'll want to run PanelPro manually (once) to select or create your desired profile. Subsequent restarts will default to the last-used profile.
Remote copy of JMRI
JMRI provides some excellent tools for "sharing" a physical connection to your layout. One of these is the LoconetOverTCP server(Digitrax-only). To use this, connect a separate computer to your RPi-JMRI wifi network. On that computer, start JMRI, and in Connections, specify Digitrax, LocoNet Over TCP. Enter the RPI's address "192.168.6.1", Save and restart. When JMRI comes up, you will be running a full copy of JMRI, with full access to all Loconet turnouts, sensors, throttles, decoder programming, etc.
For non-Digitrax layouts, follow the above steps, but specify JMRI Simple Server. Specify the "System Prefix" that matches the connection on the RPi. (Note: the Simple Server only supports Turnouts, Lights, Sensors, Reporters and Power).
Advanced
For more advanced modifications to your RPi-JMRI image, see [this page].
Software Details
Note: the following section is for information only, and is not needed to use the RPi-JMRI image. It describes the steps I have already taken in the image provided.
Started with the RaspberryPi Raspbian Bookworm (desktop only) image.
Update Raspbian using "sudo apt update;sudo apt full-upgrade -y;"
Installed java, samba and cups using "sudo apt-get install openjdk-17-jre samba cups-bsd labwc"
Set hostname, password, and localization options using "Raspberry Pi Configuration".
Using the network icon in upper right of the desktop, I created a Wi-Fi Hotspot named "RPi-JMRI", set the wifi password, enabled "Connect automatically...", and added the IPv4 address range as 192.168.6.1/24.
I leave the Wired connection at defaults, using DHCP. I set IPv6 to "Disabled" on both wired and wireless connection.
The name is broadcast as "RPi-JMRI.local". This can be useful to identify the RPi on a wired network, handy for troubleshooting wifi problems.
Set up samba share to JMRI_UserFiles folder in /etc/samba/smb.conf, run "sudo smbpasswd -a pi" and set the samba password. This provides access from windows explorer as "\\RPi-JMRI", and also causes wins to resolve that name to an ip address.
Set the vnc password using "sudo vncpasswd -service"
Use "sudo raspi-config", Advanced Options, Wayland, Labwc to select the labwc window manager.
Turn off power management on the wifi using "sudo nmcli c modify RPi-JMRI 802-11-wireless.powersave 2"
Connect to the RPi using TightVNC Viewer or similar. Using the RPi's browser, download the desired Linux version of JMRI from JMRI.org, and extract it to /home/pi/JMRI on the RPi. Start a terminal session, and run ~/JMRI/PanelPro. Set WiThrottle to autostart on port 12090 (default), and the JMRI Web Server to autostart on port 12080 (default). Set the User Files location to /home/pi/JMRI_UserFiles. Set up connections as needed, saving profiles for several popular hardware connections: PR3, LocoBuffer-USB, NCE Serial, NCE USB, SPROG, EasyDCC Serial, MERG USB, MRC Prodigy or DCC++. Each has a unique "railroad name", which is shown as the Discovered Server name, this is useful for verifying your connection.
To provide external access to the JMRI log files, ran
ln -s /home/pi/.jmri/log/ /home/pi/JMRI_UserFiles/log
Log can now be accessed as "http://RPi-JMRI.local:12080/prefs/log/session.log" from any connected browser.
I added desktop icons to view userfiles and the session log, and set the background image and color. I also checked "Don't ask options on launch executable file" in File Manager Preferences.
To load PanelPro at desktop startup, I ran:
mkdir /home/pi/.config/autostart
ln -s /home/pi/Desktop/PanelPro_autoIdentify.desktop /home/pi/.config/autostart/PanelPro_autoIdentify.desktop
PanelPro_autoIdentify.sh is a shell script which attempts to open PanelPro with the correct profile, based on identifying the attached hardware. To bypass this and have PanelPro always start with your last profile, double-click the desktop icon "Disable AutoIdentify".
To enable printing from the RPi, I ran:
sudo usermod -a -G lpadmin pi
The user can then set up printers by browsing to "http://localhost:631" from the RPi desktop. Enabling remote access is available, but not enabled by default.
To minimize the size of downloadable image, I do a bit of cleanup and set all unused space to zeroes. This helps (a lot) with the compression. Here's my cleanup script.
I then put the card in my PC and run Win32DiskImager to read the image (select "Read Only Allocated Partitions") to a file, then I use 7-Zip to compress it to the .xz that I then upload to Google Drive before adding the link to my site.